 Ukrainian / UK
 Arabic / AR
 Spain / ES
 Deutsch / DE
 Italy / IT
 zh / ZH
 French / FR
 Russian / RU
Prepare your Mac for Sale - Tutorial

Prepare Mac computer for sale: turn off Find My Mac and EFI protection password, sign out of certain services and delete (erase) your old data before doing so.
One day, we all come to the point when we feel that it’s time to upgrade our devices and to say goodbye to the ones we own now. This is when we start considering what to do with our current device, like to sell it, give it away to a family member or use a trade-in program. Whatever way you choose, you need to make sure your data and personal info is safe and a new owner won’t have access to it while using your old Mac.
Here you’ll find all the information you need on how to prepare your Mac for sale and secure all your data and personal information. This guide will provide you with a step-by-step manual how to accomplish this.
In case you don’t want to lose all your data you keep on your current Mac and use it on your new computer, our advice is to back up your device before you move to the steps described below. Time Machine is the simplest backup method as this feature is already built-in into your Mac. All you need to successfully backup your Mac is an external hard drive. Actually, making backups of your computer from time to time is a wise thing to do even if you don’t plan to give it away, sell or whatever. This way you make sure all the data you keep on your Mac won’t be lost in case your computer crashes and so on.
Sign out of Apple ID and Turn Off Find My Mac
Signing your Mac out of your Apple ID or iCloud will stop access to all your data stored in iCloud. At the same time, all your data and backups you store in iCloud will remain available to you from your other devices you use with your Apple ID. Once you sign your Mac out of your Apple ID, the following features become unavailable on it:
- Apple Pay, Apple Cash, and Apple Card
- Find My
- Game Center
- Home app to control your HomeKit devices
- iCloud Backup
- iCloud Drive
- iCloud Keychain
- iCloud Mail
- iCloud Photos
- Siri Shortcuts
- Voice Memos
- Shared Albums
- Messages in iCloud
- Reminders
- Shared Notes
- Shared Pages, Numbers, and Keynote documents
- Updates to your contacts, calendars, reminders, bookmarks, and Safari tabs
- Continuity features like Handoff, Universal Clipboard, and Auto Unlock with your Apple Watch
- App data for any third-party apps that you've installed that use iCloud
Please note that your Apple Cash and Apple Card accounts remain linked to your Apple ID and can’t be transferred to or accessed using any other Apple ID.
You will also automatically sign out of the App Store, iMessage, and FaceTime once you sign out of iCloud.
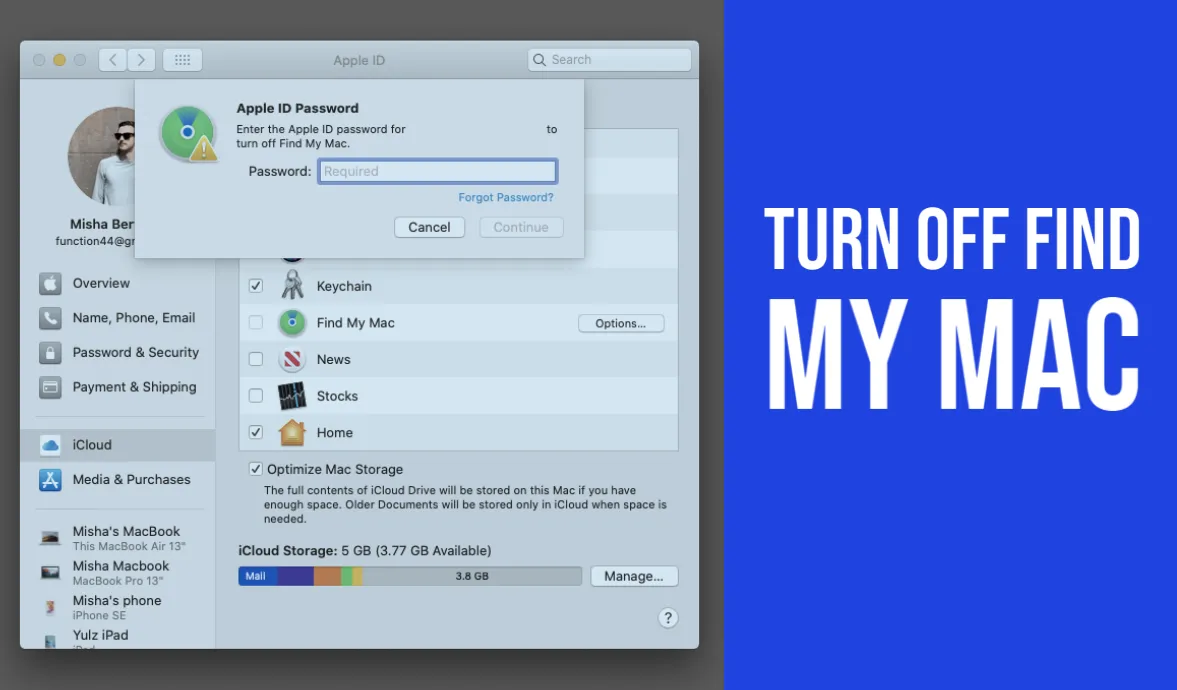
How to Sign Out of Apple ID and Turn Off Find My Mac
- 1. Choose Apple menu > System Preferences.
- 2. Click Apple ID, or, if you use macOS High Sierra or earlier, click iCloud in the left panel and uncheck Find My Mac.
- 3. Click Overview.
- 4. Click Sign Out.
- 5. If you want to keep a copy of your iCloud data on your Mac before you sign out, make sure that you select the appropriate checkboxes. Then click Keep a Copy.
- 6. If you want to keep a copy of your Safari passwords on your Mac, click Keep on This Mac.
In the process, you may be asked whether you want to keep a copy of your iCloud data or Safari passwords on this Mac. You can do this if you like, however this information will be erased anyways as you’ll be recommended to erase your drive going forward. If you still want to keep this information, here is what you should do.
Sign out of iTunes and Deauthorize Mac
The next step you should take is to sign out of iTunes and other related services, as well as to deauthorize your Mac. Below you’ll find a step-by-step guide on how to do so:
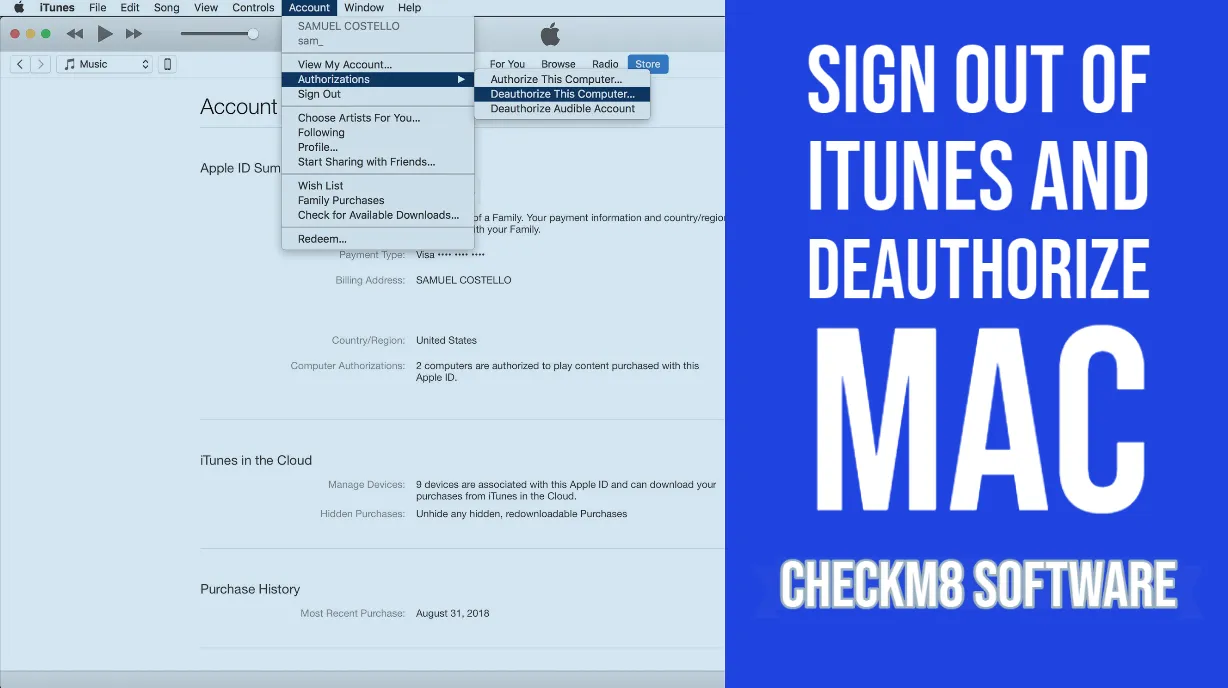
- 1. Open iTunes on your Mac.
- 2. Select Account and Authorizations.
- 3. In the drop-down menu, select option Deauthorize this Computer.
- 4. Enter your Apple ID and password.
- 5. Click Deauthorize.
As you may have already heard, this is the last year iTunes is available. According to Apple, iTunes will be discontinued from the end of 2021. So, going forward, you’ll be able to sign out of your accounts using the Music, TV or Books apps. You can open any of these apps and do the following:
- 1. Go to Account & Authorizations
- 2. Click on Deauthorize This Computer.
- 3. Enter your Apple ID and password.
- 4. Click the Deauthorize button.
We also recommend you to make sure you signed out of Messages app by:
- 1. Open Messages app.
- 2. Go to Preferences.
- 3. Click the iMessage tab.
- 4. Click on Sign Out.
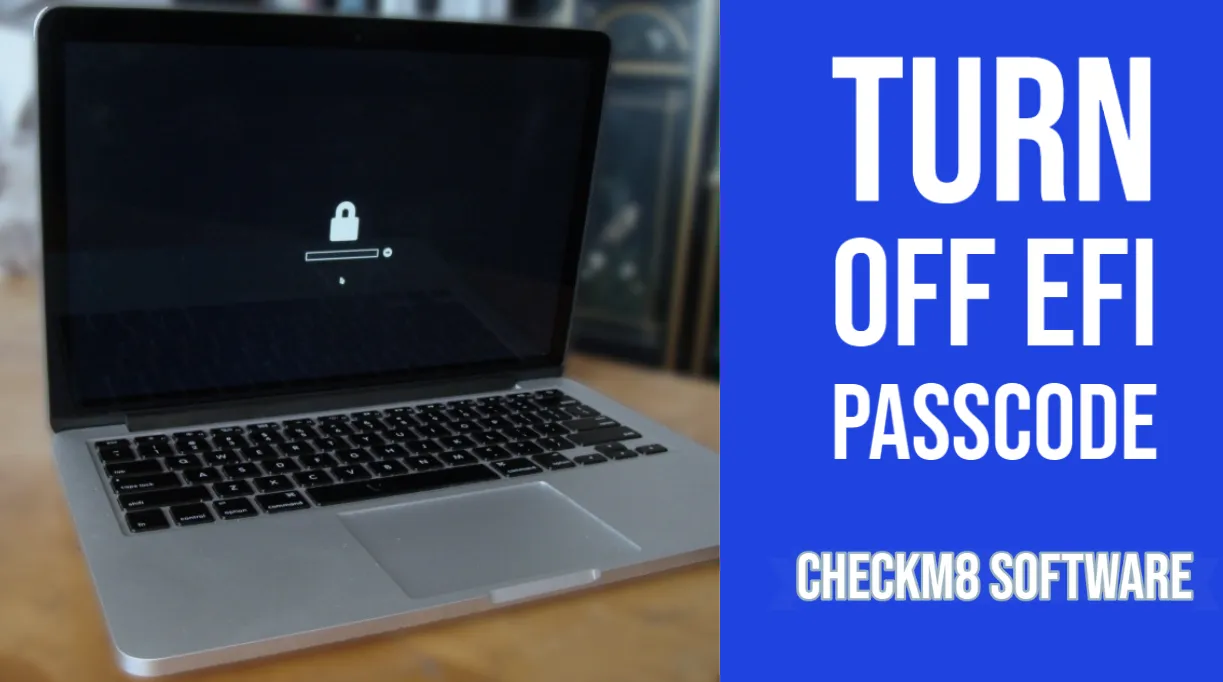
Turn Off the EFI Passcode
In the event that your Mac is equipped with T2 security chip and is protected with EFI Passcode, which is Extensible Firmware Interface, you should turn it off to enable a new owner of your Mac to perform following operations on it:
- MacOS upgrade & reinstallation
- Hard disc erasing
- Mac restoring using Time Machine.
If you have turned this feature on, here is how to turn it off:
- 1. Start your Mac from macOS Recovery. You’ll be asked to enter the firmware password while your Mac is starting up.
- 2. Once you see the utilities window on the screen, click Utilities on the menu bar, and choose Startup Security Utility or Firmware Password Utility.
- 3. Click Turn Off Firmware Password.
- 4. Enter the firmware password again when you are asked to.
- 5. Quit the utility and choose Apple menu & Restart.
How to Turn Off EFI Firmware Password?
You already know that EFI passcode is an extra security measure designed for macOS related processes, like macOS installation, reinstallation, hard disc erasing, and Mac restoring using Time Machine. You need to enter the EFI Firmware passcode to turn it off prior sale as a new owner won’t be able to perform the aforementioned processes. The firmware passcode screen appears right after your Mac is booted.
However, the chances are that you might forget the EFI passcode for any reason. So, what can you do in such circumstances. First of all, stay calm as we’ll describe several ways for you to handle this problem.
Try to reset or disable EFI passcode with Firmware Password Utility
The first approach you can try here to reset, change or disable the EFI firmware passcode is to use the same method you used to set the password. You’ll be required to boot your Mac into Recovery Mode for this method:
- 1. Reboot your Mac and hold down Command+R buttons to enter the recovery mode.
- 2. Once the utility screen appears, go to the Utilities menu and select “Firmware Password Utility”.
- 3. Select to turn the Firmware Password Off.
You’ll see a message saying that password protection is off in case of success. This is not a 100% reliable method. It works in some cases, but the chances are it won’t work in your case. However, it’s worth a try.
Turn to Apple with Request to Unlock EFI Firmware Password
If the method described above won’t help you, you’ll have to turn to Apple or Apple Authorized Support center as they can bypass or reset the EFI password for you using proprietary tools.
Quite possible that you’ll have to prove your ownership to them to unlock your locked device. However, some exceptions are possible for a number of unusual circumstances. You can discuss this issue with them directly.
How to Bypass EFI Firmware on Mac Using CheckM8 Software
There are cases when methods described above are not an option to bypass EFI Password on Mac. For this reason, the CheckM8 dev team created EFI Unlock Software to help users facing this problem. CheckM8 Software is a reliable tool allowing to bypass Mac EFI security firmware (BIOS) password protection and disable secure boot for all Apple Mac computers with a T2 security chip like: MacBook Pro and Air, iMac, iMac Pro, Mac Pro & Mini running on macOS 10.12 Sierra and up to macOS 11 Big Sur. Everything will be done just in one click!
This software is very easy to use even for inexperienced users as it doesn’t require any tech skills or background. CheckM8 Software will bypass EFI Firmware on your Mac without a need to enter any passcode or password. The service is offered in two options: data saved and data erased.
CheckM8 EFI Unlock Software offers following advantages to their customers:
- Support for all macOS devices with T2 security chip if EFI password is enabled;
- No need to know the correct EFI firmware passcode to unlock supported Macs;
- Permanent unlocking service, meaning your Mac will be fully workable after the EFI passcode is removed.
The entire process includes four simple steps. You’ll need to have one more Mac computer which is non-locked. You’ll install the Checkm8 Software on it. Another thing you’ll need is USB type C - USB type C cable which will connect both computers. The on-screen guide will tell you exactly what to do on each step of the process. There is no need to enter any EFI password to unlock your macOS device.
Here is the step-by-step guide on Checkm8 EFI Unlock Software:
- 1. Download and install Checkm8 EFI Unlock Software on the non-locked Mac.
- 2. Connect both Macs using a Type-C cable.
- 3. Put the EFI locked Mac into DFU mode. The software will detect your Mac in DFU mode and display its tech specs, including the ECID number required to be entered in the order form. The ECID number of your locked Mac will be entered into the Checkm8 database.
- 4. Click the “Start” button to start the unlocking process.
As you can see, the process is very easy and anyone can use CheckM8 Software to bypass EFI Firmware on Mac. You can find more detailed information and step-by-step guides at EFI Unlock service page.
As a bottom line, our hope is that this post was helpful and gave you all the information you need to prepare your Mac for sale. Following these advices, you make sure your personal information and data stays safe and the new owner of your Mac won’t have access to any of it.
Download SoftwareErase All Data from Mac
Now you are ready to erase all your data and information from your Mac computer which you are about to sell. Doing so you’ll erase your Mac’s drive and restore it to its factory settings.
There are many ways to have this done. But we’ve chosen the easiest way for your convenience. Our advice is to use Disk Utility to format your drive and reinstall macOS.
- 1. Turn your Mac off.
- 2. Turn on your Mac again and immediately press Command and R buttons.
- 3. You may be asked to select a user and log in with the password linked to this user’s account.
- 4. Utilities window will be displayed and you should select Disk Utility.
- 5. Select Macintosh HD from the sidebar.
- 6. Click Erase and enter a new disk name and format. To make things easier, you can just leave both as Macintosh HD and APFS or Mac OS Extended (Journaled).
- 7. Click Erase Volume group. If this option is unavailable, click Erase.
- 8. In the event that you did not turn Find My Mac earlier, here you’ll be asked to disable this feature using your Apple ID and password.
- 9. If you wish to delete any other internal volumes besides Macintosh HD, just click the minus icon next to this volume(s).
- 10. Quit Disk Utility.
Reinstall macOS
The final step you should take before giving your Mac to someone else’s hands is macOS reinstallation. There are several ways to do this and we’ll list them for you here.
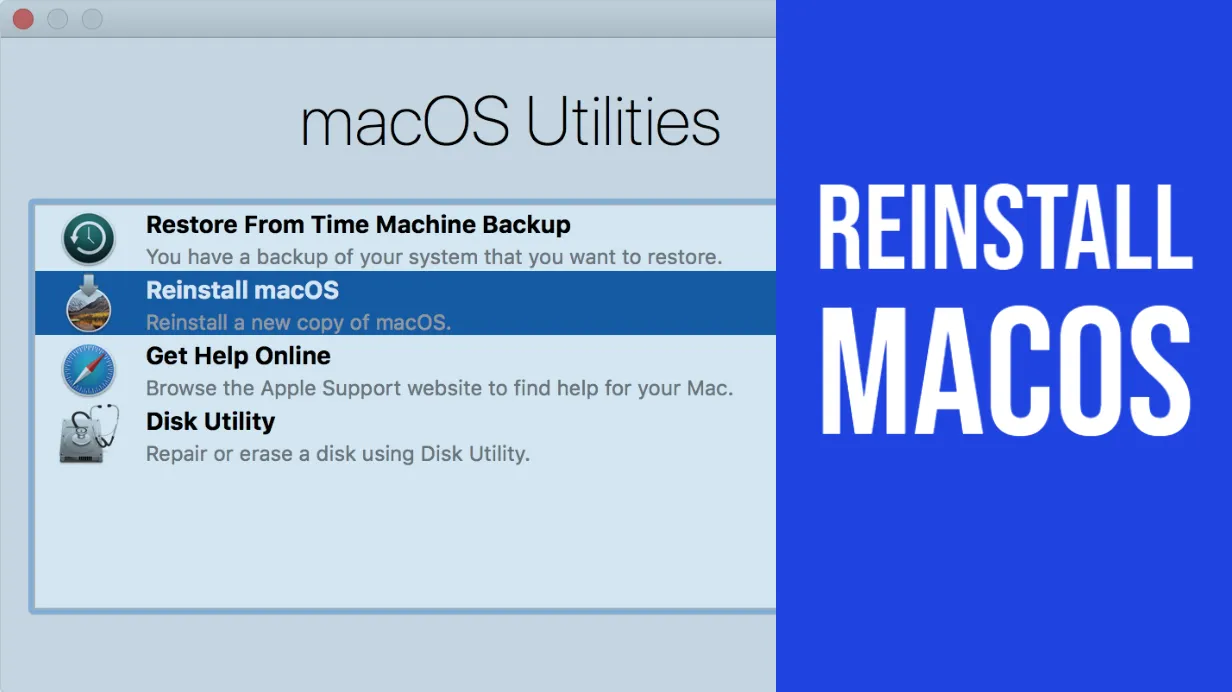
You should use macOS Recovery for the purpose of macOS reinstallation. So, start up your Mac from macOS recovery. You should determine the type of your Mac, is it Apple Silicon or Intel processor. Once determined, choose one of the following options:
- For Apple silicon: Turn your Mac on and keep pressing and holding the power button until the startup options window is displayed. This window has an Options gear icon. Select it and click Continue.
- For Intel processor: Make sure your Mac has a connection to the Internet. Turn your Mac on and immediately press and hold Command (⌘) -R until Apple logo or another image appears.
You may be asked to select a user you know the password for, do it, click Next, and enter administrator password.
Now let’s start macOS reinstallation itself!
Select Reinstall macOS option in the utilities window in macOS Recovery, click Continue and follow the on-screen instructions and following guidelines:
- Allow installation to complete without putting your Mac to sleep or closing its lid. Your Mac might restart and show a progress bar several times, and the screen might be empty for minutes at a time.
- If the installer asks to unlock your disk, enter the password you use to log in to your Mac.
- If the installer is for a different version of macOS than you expected, you can find other installation options below.
- If the installer offers you the choice between installing on Macintosh HD or Macintosh HD - Data, choose Macintosh HD.
Once macOS installation is complete, the chances are that your Mac will restart to a setup assistant. Since your plan is to give your Mac to other people’s hands via sale, trade-in or in any other way, the best choice is to quit the assistant without completing setup by pressing Command-Q and clicking Shut Down. This way, a new owner will use their own information to complete setup when he or she starts up the Mac for the first time.
As for other macOS reinstallation options, you can find them below. Please note that by default macOS Recovery installs the latest macOS version which was previously installed on the Mac. One of the following options will allow you to install other macOS versions.
- In case macOS Sierra 10.12.4 or later was never previously installed on your Mac, you’ll get the macOS your Mac originally came with, or the closest version still available.
- If your Mac is equipped with the T2 Security chip and you have never updated macOS on it, you’ll get the latest macOS which was installed on your Mac.
For intel-based Macs which were previously running on macOS Sierra 10.12.4 or later, you can use Shift-Option-Command-R at startup. This option will install the macOS version your Mac came with, or the closest version still available.
You can also use the App Store instead of macOS Recovery to reinstall macOS on your Mac. In case you can’t install the latest macOS version released, the chances are you’ll be able to install an earlier version.
One more option available to you is to create a bootable installer and use it for macOS installation on your current Mac or another Mac.
How to Turn Off Find My Mac in Case of Locked Apple ID?
As was already said, you should turn Find My Mac off while preparing your Mac for sale. You’ll have to enter your Apple ID and password to do so. But if your Apple ID is locked for some reason, you should unlock it before turning Find My Mac off. Below you’ll find a detailed guide telling what to do in case your Apple ID is locked or disabled.
For those using two-factor authentication, you’ll need to have a trusted device or phone number at hand to reset your Apple ID and password which, in turn, will unlock your account. You can also use a recovery key if you have one.
In the event that your device displays a message saying your account has been disabled in the App Store and iTunes Store, you should contact Apple Support for help.
In case when your Apple ID was locked for security reasons, one of the following alerts may be displayed:
- "This Apple ID has been disabled for security reasons"
- "You can't sign in because your account was disabled for security reasons"
- "This Apple ID has been locked for security reasons"
There is another option you can use if you use a security question with your Apple ID, or if a trusted phone number or device is unavailable. You can go to iforgot.apple.com to unlock your account with your existing password or reset the password. Your Apple ID will remain locked after multiple attempts to unlock it. However, you can try again the next day.
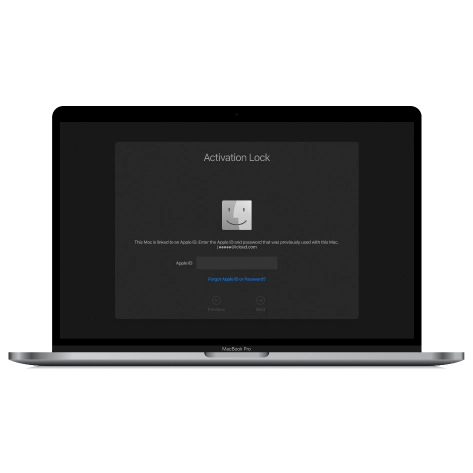
Use CheckM8 Software to Bypass Activation Lock Without Turning Off Find My Mac and Apple ID
The truth is, a large number of users find themselves in the situation when they just forgot their Apple ID or password used for their Macs, or they can’t use options listed above for some reasons. So, if you enter incorrect Apple ID or password several times, your Mac becomes Activation Locked.
This is why the CheckM8 dev team designed the software capable of bypassing Find My Mac Activation Lock on Mac computers equipped with Apple’s T2 security chips running on macOS 10.12 Sierra and up to macOS 11 Big Sur.
The CheckM8 Software works on the following computers:
- iMac introduced in 2020
- iMac Pro
- Mac Pro introduced in 2019
- Mac Mini introduced in 2018
- MacBook Air introduced in 2018 or newer
- MacBook Pro introduced in 2018 or newer
The main advantage of Mac Activation Lock Bypass Tool by CheckM8 is that you won’t be required to enter Apple ID or password to bypass the Activation Lock on your Mac. The software has a user-friendly interface and will bypass the Activation Lock on your T2 Mac just in 1 click!
You’ll need an unlocked Mac computer and USB Type-C – USB Type-C cable for successful Activation Lock Bypass. The entire bypassing process will take not more than 1 minute and requires 4 simple steps:
- 1. Download the Checkm8 Mac Activation Lock Bypass Software and install it on the unlocked Mac computer.
- 2. Connect both Mac computers with a USB Type-C – USB Type-C cable.
- 3. Put the Activation Locked Mac into DFU mode. Checkm8 Software will verify it to make sure that Mac in DFU mode is supported. If so, you’ll be offered to buy the license for the activation locked Mac.
- 4. Click the Start Bypass button and wait for the bypassing process completion.
Please Note!Checkm8 Software license will be provided for the verified MacBook only. Its serial number will be entered into the database. This will allow you to repeatedly use it for free in case of relock.
Watch a video of the Activation Lock Bypass process using the CheckM8 tool.
Once the Activation Lock Bypassing process is complete, your newly unlocked Mac computer will turn off. Push a power button to turn it on and start using it with your Apple ID.
If you find yourself in a situation like this and have no idea how to solve the Find My Activation Lock issue on your Mac, the CheckM8 Software is the perfect solution for you! Visit Bypass Mac Activation Lock service to find a detailed step-by-step guide and service description.
Tools for unlocking Mac Computers.
-
MacOS Activation Lock Bypass Tool
Price from $89.00
If your MacBook, iMac, Mac Mini, or Mac Pro is based on the INTEL T2 Chip, you can utilize the CheckM8 software to bypass the Find My Mac and remove the MacOS iCloud Activation Lock screen
Discover SoftwarePrice from $99.00
-

EFI Firmware Passcode Unlock Tool
Price from$99.00
A fast and effective solution to unlock the EFI security firmware (BIOS) password protection on any Mac equipped with the T2 chip is available
Discover SoftwarePrice from $99.00
-

MacOS Remote Management Bypass Tool
Price from$29.00
This tool is designed to bypass remote management on MacOS, allowing you to gain full access to your MacBook without any restrictions imposed by the MDM lock screen.
Discover SoftwarePrice from $29.99
-
MDM Unlocking Tool [T2 INTEL]
Price from$79.00
The new CheckM8 software provides a permanent MDM unlock solution for MacBook Pro, Air, and other Mac computers that are equipped with T2 processors.
Discover SoftwarePrice from $79.99
-
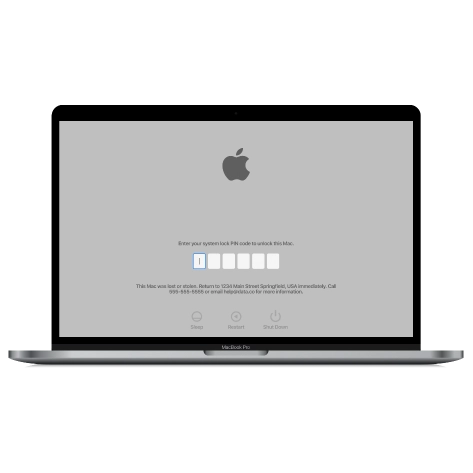
MacOS iCloud PIN Lock Bypass Tool
Price from$49.00
If you're having trouble with the iCloud PIN lock screen or have forgotten your PIN, this software can help you bypass the lock screen and regain access to your Intel-based MacBook
Discover SoftwarePrice from $49.00
Tools for unlocking iPhone and iPad.
-
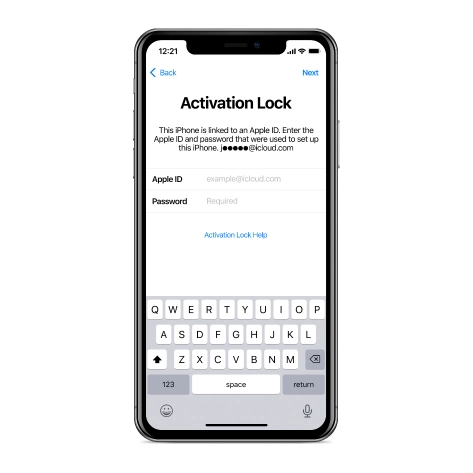
iCloud Activation Lock Removal Tool
Price from $15.99
This tool is used to get rid of the iCloud Activation Lock from iPhone and iPad devices running on iOS up to version 18
Discover SoftwarePrice from $15.99
-
![Remote Management [MDM] Bypass Tool](https://checkm8.info/new/img/service/remote-management-iphone-unlock.webp)
Remote Management [MDM] Bypass Tool
Price from $44.99
This software allows you to bypass the Mobile Device Management (MDM) Configuration Profile and remove the MDM lock screen on any iPhone and iPad model
Discover SoftwarePrice from $44.99
-
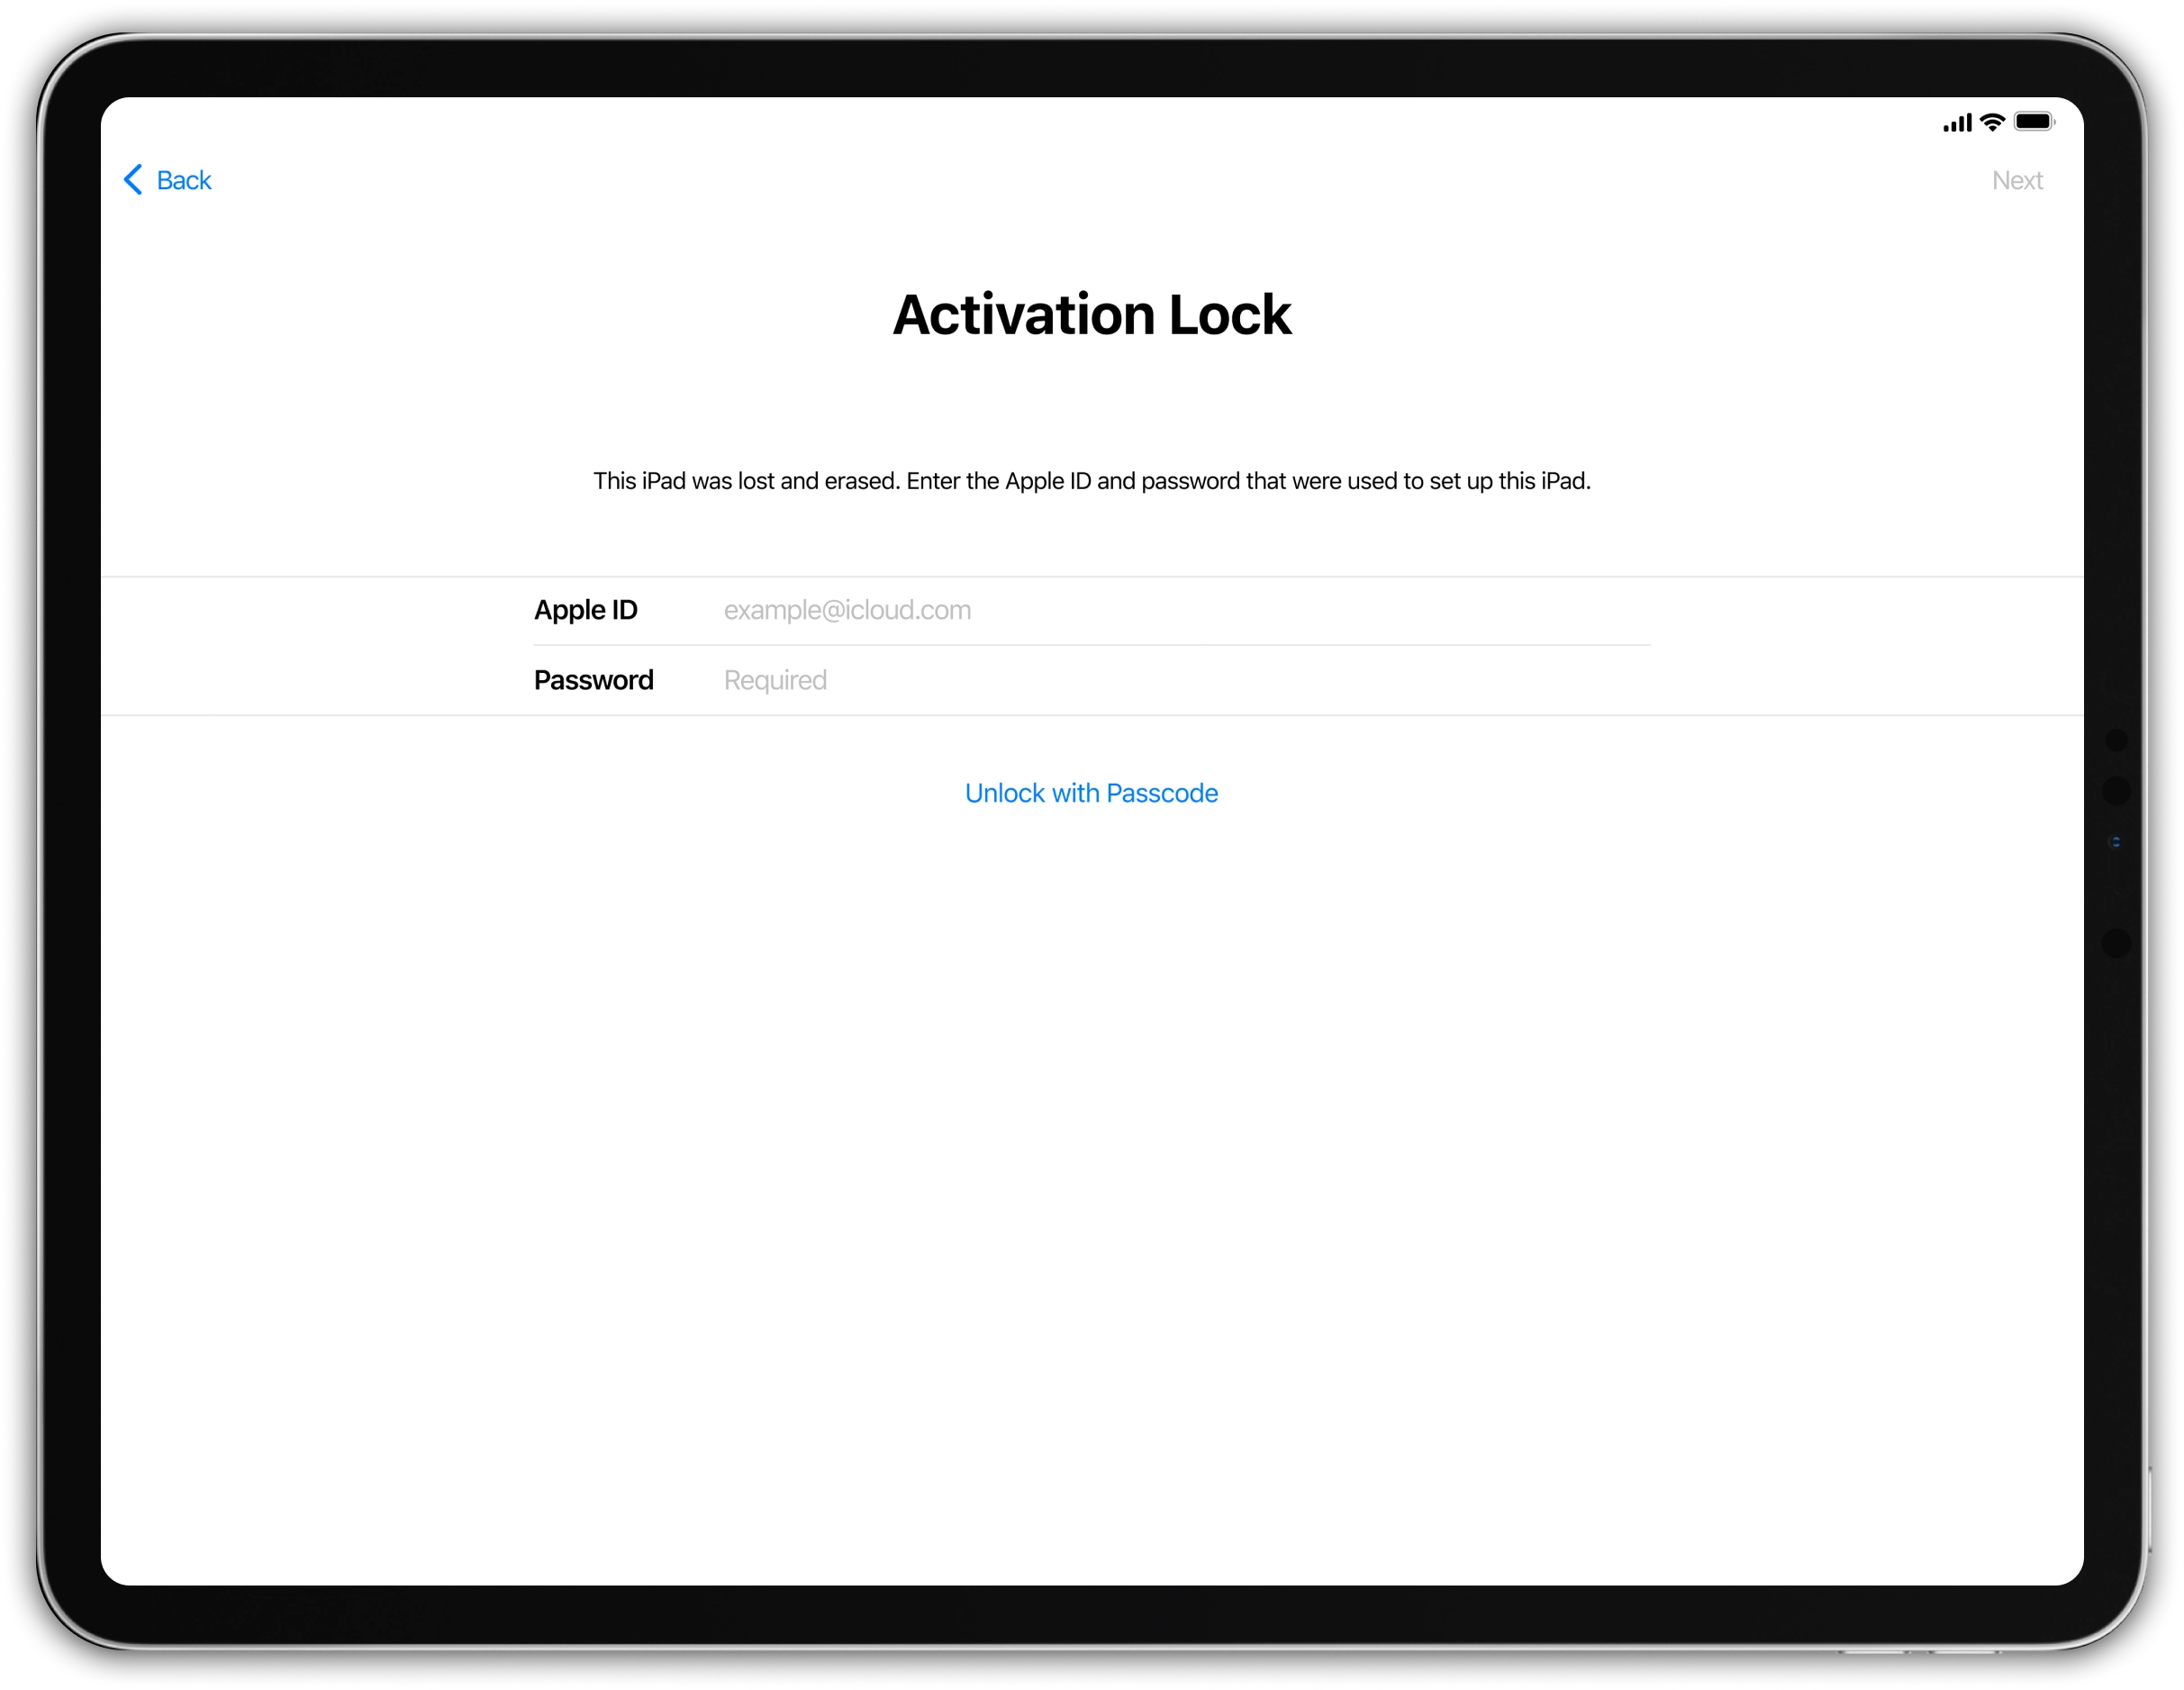
iPad FMI OFF [INSTANT]
From $69.99
Unlock Supported iPad WiFi Models in Minutes Remove Find My iPad (Activation Lock) from supported WiFi-only iPad models using the official CheckM8 FMI OFF Service.
Discover SoftwarePrice from $69.99