 Ukrainian / UK
 Arabic / AR
 Spain / ES
 Deutsch / DE
 Italy / IT
 zh / ZH
 French / FR
 Russian / RU
How to Jailbreak iOS on an iPhone or iPad Using CheckRa1n
The latest version of the checkm8-based checkra1n jailbreak tool was just released by the checkra1n dev team. This version supports iOS 12 - iOS 14.8.1 devices. Here we should mention that the version released in November 2019 is actually a public beta version released for masses. Therefore, our recommendation is to wait for it to come out of beta. At the same time, your anxiety to try it right away is totally understandable.
Our step-by-step tutorial will show you how to use the checkra1n jailbreak tool. This tool was developed to give you the freedom you need while using your supported iPhone, iPad or iPod touch.
First of all, as for the most jailbreaks tools, there are certain requirements you should meet to succeed with the jailbreaking process. Here they are:
- Currently, the tool is compatible with macOS only. But dev team states that Windows and Linux versions are on the way.
- The latest iTunes version installed on your Mac. In case you use macOS Catalina, you are good. Finder already has your covered.
- The tool supports 64-bit A5-11 iPhones and iPads. This way, it works with iPhones from 5s up to X. However, there are few exceptions it doesn’t work with, which are iPad Air 2, 5th generation iPad and 1st generation iPad Pro. Considering this, Checkm8 exploit doesn’t support A12 devices (iPhone XS Max, XS, XR, iPad Pro) and A13 devices (iPhone 11, 11 Pro, 11 Pro Max).
- The device should run iOS 12.3 or newer.
- The tool is currently experimental on iPhone 5s, iPad mini 2, iPad mini 3 and iPad Air.
- Cydia is installed by default. Other package managers will be added as options at a later date.
Another thing we should note here is that checkra1n beta release is CLI-only (Command Line Interface). However, there is a GUI workaround and we’ll show it in this tutorial.
So, if you comply with the requirements listed above, it’s about time to get actually started.
Step 1. Download the checkra1n jailbreak tool to your Mac. Download it from the official site only.
Download CheckRa1nStep 2. Once the download is completed, open .dmg file by double-clicking on it and drag the checkra1 app to the Applications folder on your Mac.
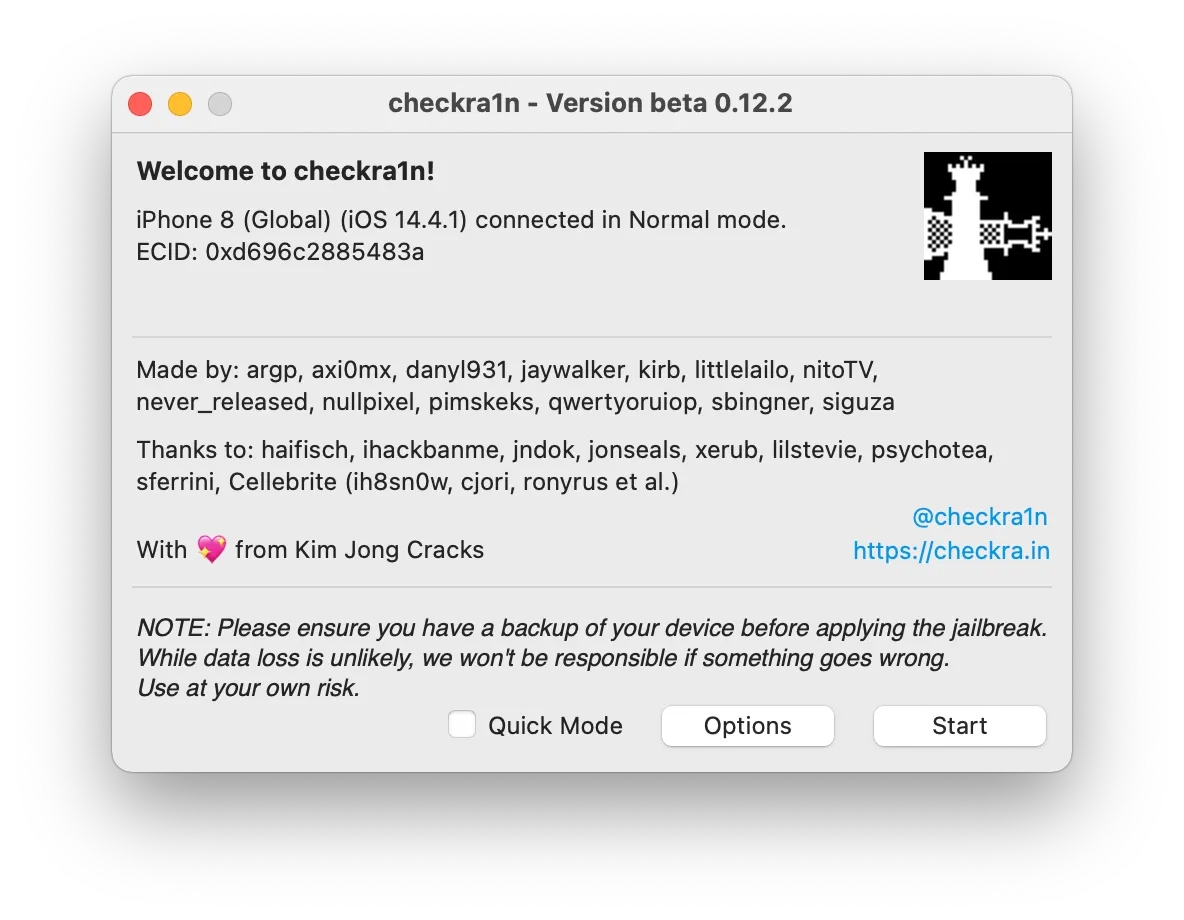
Step 3. Open the application folder, right-click on the checkra1n app and select Show Package Content option. Go to checkra1n -> Contents -> MacOS and double click on checkra1n_gui Terminal file. You may receive the warning saying the program was obtained from the Internet. This is a security precaution placed by Apple. In this case, launch System Preferences -> Security & Privacy and click open anyway.
Step 4. The cjeckra1n jailbreak app will greet you. You should make sure that the checkra1n has recognized your connected device. If you connect this device to the Mac for the first time, your connection should be trusted. This will be done in Finder if you use macOS 10.15 or newer version. For macOS 10.14 or lower, this will be done in iTunes. In both cases, click “Trust” or “Continue” and tap “Trust” on your device’s screen.
Step 5:Launch Finder and click “Back Up Now”. The backup will keep your data safe if a need to restore your device will arise during the jailbreak process.
Follow the instructions below to enter recovery mode:
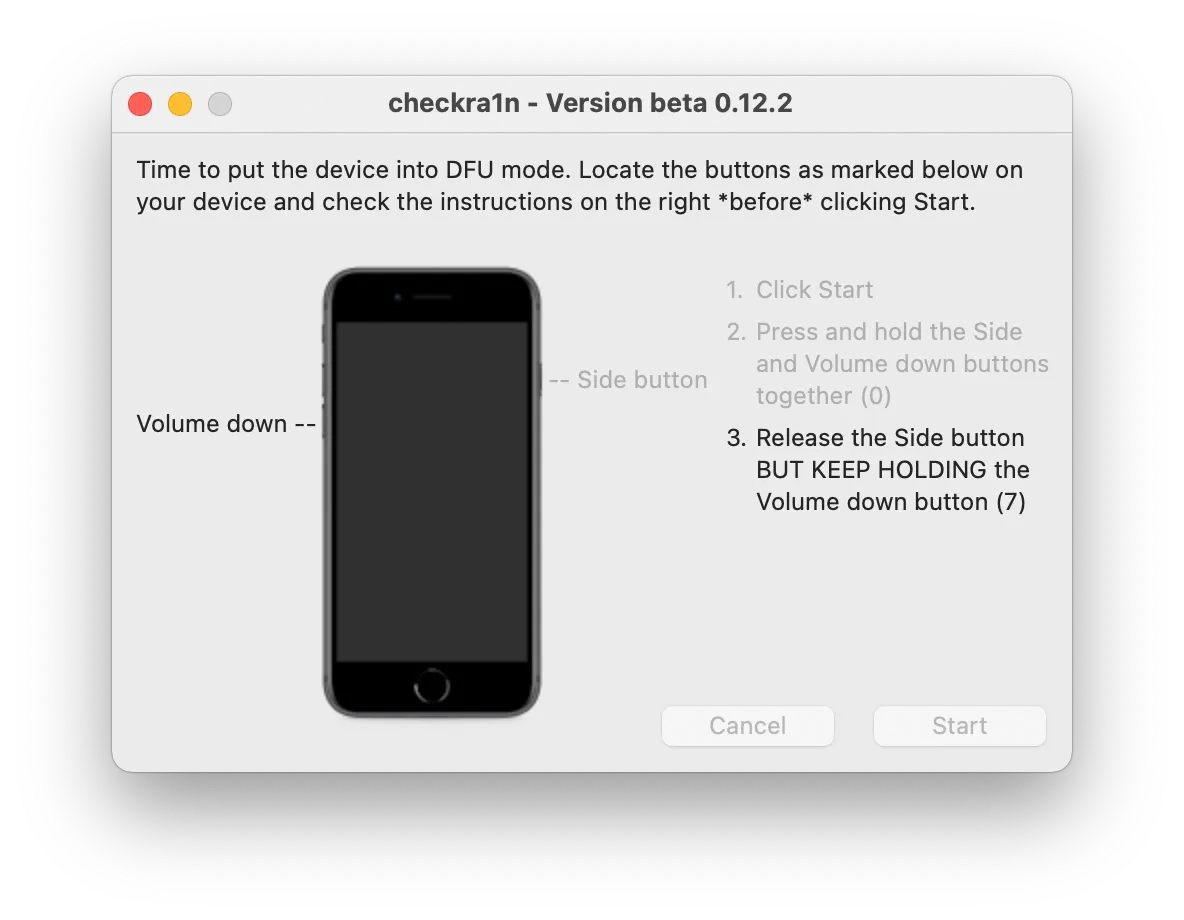
If it happens that your device reboots during this process, just start it over. It is possible you won’t complete the process on the first try. Don’t give up, keep trying. Eventually, you’ll put your device into DFU mode. This process will become a routine for you as you’ll have to go through it every time you need to boot tethered.
Note: You should be aware of the extreme importance of this step. If DFU mode step is failed, the jailbreak app will be restarted and you’ll have to start this process over again until it is completed correctly.
How to Put iPhone in DFU ModeStep 7. Once your device enters DFU mode successfully, checkra1n will start your device exploiting and jailbreaking.
Step 8. During the process, a verbose log of the entire jailbreak process will be shown on your device’s screen. DO NOT disconnect it or do anything with the device until the jailbreak is completed. The process will take some time which depends on the device. As a rule, the jailbreak process is fast. Be patient, stay calm and do not disconnect your device and Mac.
Step 9. The device will respring. If everything worked out properly, now you should see the Checkra1n app on the Home screen of your iOS device. Open the app and brand-new Loader screen should launch.
Step 10.Tap Cydia cell. Next, tap Install Cydia button. The checkra1n will start the base system download and Cydia installation. Once the process is finished, the app will be closed, device will respring and you’ll see Cydia on the Home screen. Now, you are free to launch it and install your favorite jailbreak tweaks.
That’s it! Enjoy your jailbroken iOS device.
Note: Tethered booting is the jailbreak part which has to be done every time you restart your device to use “jailbreak things”. To do so, enter DFU mode again as described above.
Hopefully, this tutorial gave you all the information you need. Our aim was to guide you through the entire jailbreak process using checkra1n which will give you the liberty to take full advantage of your iOS device and remove any restriction being out in the way.
Tools for unlocking Mac Computers.
-
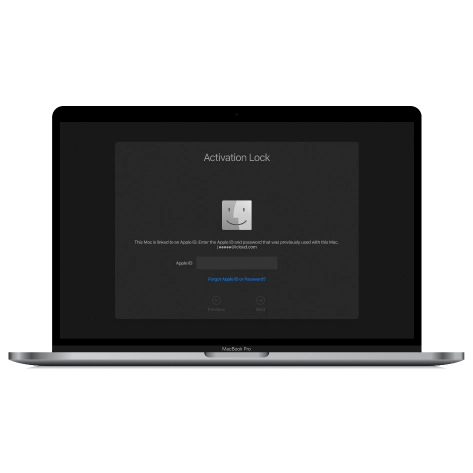
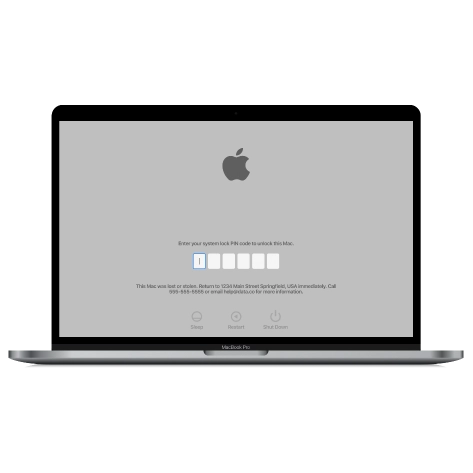
MacOS Activation Lock Bypass Tool
Price from $89.00
If your MacBook, iMac, Mac Mini, or Mac Pro is based on the INTEL T2 Chip, you can utilize the CheckM8 software to bypass the Find My Mac and remove the MacOS iCloud Activation Lock screen
Discover SoftwarePrice from $99.00
-

EFI Firmware Passcode Unlock Tool
Price from$99.00
A fast and effective solution to unlock the EFI security firmware (BIOS) password protection on any Mac equipped with the T2 chip is available
Discover SoftwarePrice from $99.00
-

MacOS Remote Management Bypass Tool
Price from$29.00
This tool is designed to bypass remote management on MacOS, allowing you to gain full access to your MacBook without any restrictions imposed by the MDM lock screen.
Discover SoftwarePrice from $29.99
-
MDM Unlocking Tool [T2 INTEL]
Price from$79.00
The new CheckM8 software provides a permanent MDM unlock solution for MacBook Pro, Air, and other Mac computers that are equipped with T2 processors.
Discover SoftwarePrice from $79.99
-
MacOS iCloud PIN Lock Bypass Tool
Price from$49.00
If you're having trouble with the iCloud PIN lock screen or have forgotten your PIN, this software can help you bypass the lock screen and regain access to your Intel-based MacBook
Discover SoftwarePrice from $49.00
Tools for unlocking iPhone and iPad.
-
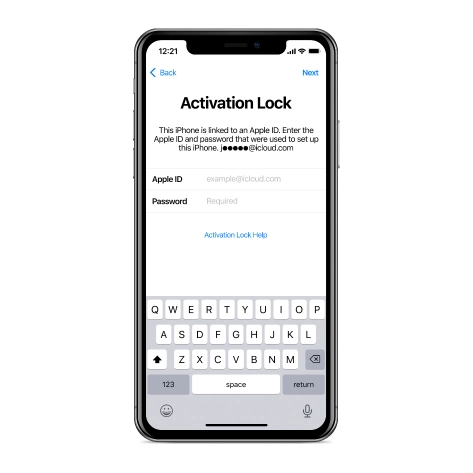
iCloud Activation Lock Removal Tool
Price from $15.99
This tool is used to get rid of the iCloud Activation Lock from iPhone and iPad devices running on iOS up to version 18
Discover SoftwarePrice from $15.99
-
![Remote Management [MDM] Bypass Tool](https://checkm8.info/new/img/service/remote-management-iphone-unlock.webp)
Remote Management [MDM] Bypass Tool
Price from $44.99
This software allows you to bypass the Mobile Device Management (MDM) Configuration Profile and remove the MDM lock screen on any iPhone and iPad model
Discover SoftwarePrice from $44.99
-
Open Menu FMI iCloud Unlock
From $14.99
This tool is made for iPhones and iPads that are not stuck on the Activation Lock screen, but instead are fully working devices with access to Media & Purchases menu
Discover SoftwarePrice from $14.99